Showing posts with label DT Kimberly Jones. Show all posts

Monday, September 15, 2014

Vintage Flashcard Dos-à-Dos Sketchbook


Vintage Flashcard Dos-à-dos Sketchbook by Kimberly Jones

Ever since I found a stash of jumbo vintage flashcards I've been thinking about various ways to use them for handmade books. With a generous length of 3.5" x 10.25" they proved to be ideal for a double-sided mini sketchbook!  It includes a mix of papers for jotting down notes and journaling, and watercolor paper for sketching, painting, or collage.


To make a Dos-à-dos book of your own you will need a few simple materials:

  • Vintage Flashcard {or cardstock or heavyweight paper}
  • Bone Folder or other Scoring Tool
  • Scissors
  • Decorative Tape or Masking Tape
  • Awl or piercing tool
  • Tapestry Needle with a large eye
  • Ribbon or other binding thread
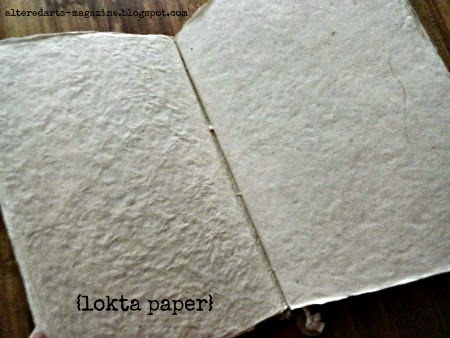
  • A variety of paper including watercolor paper


Here's how to make the sketchbook:

  • Score the flashcard into thirds and fold.
  • Wrap tape around the spine to reinforce and embellish it.
  • Measure the paper for each side of the book. The paper should be the same height and 2X the width of each section. Fold the paper and stack 3 pieces together for each signature.
  • Pierce each section of the flashcard and the signature for in the center to create holes for stitching.
  • Thread the ribbon through the hole, wrap it around the spine, then go back through the same hole and tie a knot. Start on the outside of the cover and leave a long tail to wrap around the book as a closure.
  • Start on the inside of the second signature, wrap the ribbon around the spine, bring through the hole and tie a square knot. Snip off any excess ribbon.


An aerial view of the sketchbook shows both sides, one with watercolor paper, and the other with a mix of vintage book paper, handmade paper, a tag, and an old slide. The beauty of this type of book is that it can be made in a variety of sizes with an endless array of papers and binding threads or ribbons! Dos-à-dos is a French term meaning "back to back" and traditionally includes two separate books that are bound together, but this is my nod to that type of binding.


Here's the sketchbook all closed up with the ribbon and a sparkly clip-on earring to hold it in place. I already started embellishing the book with some vintage stamps from my stash, and some text and images from a book about birds. This will be a fun little book to tuck into my tote bag for sketching and collaging on the go! If you don't have flashcards this large, you can substitute any heavyweight cardstock or paper in the size you choose. I hope you'll enjoy making your own!
Until next time - make art...be happy!
Kimberly


Monday, July 21, 2014

Feather Studies


I love to explore a wide variety of art media and processes. From altered arts to bookmaking, collage, encaustic art, embroidery, textile art, origami, mixed-media - you name it, I've probably given it a whirl! No matter where my artful adventures may lead me however, I've discovered that a few motifs nearly always make their appearance in my work. Feathers are definitely one of my favorite elements to include! Their delicate beauty, graceful lines, and colorful variety make them a favorite detail for collage or mixed-media art.


I created the handmade sketchbook shown here as a special place to gather my favorite feather images, so that I can practice drawing and painting them. The book includes a variety of pockets, papers, and tags, that allow to me experiment with sketching and painting while documenting the various pens, pencils, markers, or paints that I use. It's a fun reference tool that I can refer to again and again!


For my Feather Studies book, I printed out some beautiful images from The Graphics Fairy to serve as inspiration. Her website has 1,000s of images that are copyright free, and cover a huge variety of topics. Do you have a favorite motif that runs throughout your artwork? If so, I would love to hear about it! You  might find it useful to dedicate a sketchbook that you purchase, or one you make yourself to that favorite element and use it to document your artful adventures.
Until next time: Make art...be happy!
Kimberly


Monday, July 7, 2014

Traveling Bookbinding Kit

Traveling Bookinding Kit by Kimberly Jones alteredartsarts-magazine.blogspot.com

I find lots of fun ephemera and papers on my travels, and I love to make books with with the treasures I discover. I decided to create a compact kit with all the essentials I need for bookbinding, so I can just toss it in my bag and go!

Traveling Bookbinding Kit Contents by Kimberly Jones altered arts-magazine.blogspot.com

I found a plastic photo holder that was just the right size to contain all the basic supplies and tools I need for making books by hand. One unexpected item, the rubber finger tips, are available from office supply stores. They help protect your fingers when stitching through many layers of paper. The jumbo paper clips are perfect for holding signatures in place while I stitch, and a heavy-duty awl will go through just about anything.

The kit came in handy when I decided to stitch together a quick and easy book with some of my favorite found papers. I used corrugated cardboard, sheet music, glassine bags and envelopes, player piano paper, and a jumbo flashcard. Even at home, it's so convenient to have my basic tools together in one place. If I add a glue stick, I will have all I need for making books and collage art too!
Until next time, make art...be happy!
Kimberly

Saturday, June 21, 2014

Altered Magazine Bird Collage


When it's time to choose an image as a focal point for a collage, I often decide to put a bird on it! I love to work with vintage papers, but magazines can provide a wealth of text and imagery for collage art. When I first started using magazines for collage, I was a little concerned that the glossy finish of the pages wouldn't meld with the aged papers I like to use. I soon discovered that a bit of paint and ink can completely transform a magazine image and make it blend right in with the other collage elements.


I found the image for my most recent collage in the pages of Birds & Blooms magazine. As the title indicates, it's filled with colorful pictures of birds, flowers, and other nature-inspired images and text. I often find back issues of this magazine at library sales, so it can be an inexpensive and bountiful source for collage material.


Some of the other fun elements I included in this particular collage were vintage wallpaper from an antique shop, and some Chinese calligraphy paper I found at a wonderful store in Portland, OR called CARGO. I used a white Uniball Signo pen and a gold Uniball gel pen for the lettering and the pen work that added the finishing touches to this collage. If you have a favorite subject for your artwork, don't hesitate to hunt for magazines on the topic. You'll be sure to find lots of great images that you can easily alter and use for your collage and mixed-media projects.
Have fun cutting and pasting!
Kimberly

Saturday, June 7, 2014

A Bird Knows Mini Book


I'm nearly 2,000 miles from home visiting dear friends in California! My family and I began our journey in Portland, OR and drove down the Pacific Coast Highway to San Francisco, and then headed 4 hours east to our friend's home. The journey was filled with spectacular views of the silver Pacific Ocean, majestic redwoods, mist-shrouded mountains, and beautiful architecture in San Francisco. I'm not homesick, but thoughts of home are always in the back of my mind. I'll miss the beauty of the west coast and the company of our friends, but like a bird, I'm always happy to return to my nest and the familiar comforts of home.

I brought a few essential art supplies with me, and along the way I've been gathering pretty paper and shiny bits and baubles. I found this charming package at Monticello Antiques while we were visiting the beautiful city of Portland, OR. I used the contents along with some stickers to make a little mini book expressing my sentiments about home. I wish I could stay longer in this lovely area, but home is calling and I must fly back soon and feather my nest with my newfound treasures.

Wednesday, May 21, 2014

Sea Dreams Cottage


Houses are one of my favorite motifs for mixed-media art, so I was very excited when I learned that the theme for the Spring 2014 issue of Altered Arts Magazine was Homes and Abodes! I've always dreamed about living in a little cottage by the sea, so I decided to create a mixed-media assemblage using Sea Dreams Cottage as my theme.


Here's a little glimpse of the project while it was still a work in progress. I started with an unfinished wooden house from the craft store.  Color Wash papers from Pink Paislee provided the perfect backgrounds for a painterly pink-washed sky, blue seas, and soft green sea cliffs.


I used snippets of my favorite fabrics and vintage trims to create the scenery, and vintage buttons from my stash for the finishing touches. I thought the watercolor vellum banners from Pink Paislee looked so coastal and charming!


If you haven't ordered your copy of the Spring 2014 issue of Altered Arts Magazine, you can do so here. You'll be so inspired by the beautiful projects inside!
Happy altering!
Kimberly

Wednesday, May 7, 2014

Altered File Folder 6 Pocket Book


A happy day for me is spent cutting, pasting, painting, collaging, and making books! This altered file folder project combines all my favorite things in one colorful package!


I was inspired by these pretty papers from Lawn Fawn to use red, black, and a dash of blue for my main color palette.


The base for the book is a standard manilla file folder. A few simple folds are all you need to turn the folder into a book with 6 pockets! You can score at the fold lines if you wish, but I just folded away and burnished the fold lines with a craft stick. I prefer to make the folds before I begin adding any collage materials. The folder will be a bit bulky once you've added all those layers of paper, tape, and paint, so it's easier to manipulate if the folds are already created.


I added layers and layers of torn paper, acrylic paint, gesso, tissue paper, along with Washi tape, fabric tape, and masking tape. Just play with your favorite materials and techniques until you've covered all parts of the folder, or just the parts that will be seen if you prefer!


The inside of the book has two pockets. I tucked in some glittery postcards from the amazing Book for Paper Lovers by Flow magazine, and a quote from that same book that I cut apart. {See a flip-through of this fabulous book on my Instagram account @artfullvintage}


Here's the back cover of the book. The glittery postcard is tucked into one of the side pockets, and a large manilla tag is in the other pocket.


Creating the side pockets is very simple. Just add double-sided tape to the top and bottom edges of the folder as shown. I'm showing the plain folder here, but be sure to add the tape AFTER you have finished collaging the folder!

I hope you enjoyed this fun and easy project and that you will make some file folder books using your favorite colors and materials. Happy altering!
Kimberly

Monday, April 21, 2014

Citra Solv Adventures


Citra Solv is a natural cleaner with a wonderful citrus scent. But I didn't break out my bottle for spring cleaning! This versatile product is an amazing tool for creating artful backgrounds, ATCs, image transfers, and so much more!


I created these dreamy backgrounds using nothing more than a generous application of Citra Solv on some pages in an old copy of National Geographic. Simply fill a spritzer bottle with some of the cleaner, liberally coat several pages of your choice in the magazine, and allow the pages to mush together for 10-15 minutes. {If you prefer, you can directly apply the Citra Solv with a foam brush} Open the pages, mush together some more if you wish, and then soak up any excess ink with paper towels. Tear out your favorite pages, allow them to dry, and you will have several unique backgrounds for your art! The process can be quite messy, so be sure to cover your work area with newspapers for easier clean-up.


Here are a couple of pages I created for my art journal using the backgrounds and an image transfer of a bird from The Graphics Fairy.


Creating an image transfer using Citra Solv is a very simple process. Just follow these easy steps:
  • Print out an image using a laser printer, or get one made at a copy shop or your local library. The ink used needs to be toner-based to work, so don't use copies from an ink jet printer. Be sure to reverse the image when printing, especially if contains any text.
  • Place the image face down on the desired surface, saturate a cotton ball with Citra Solv and rub it all over the paper until the image is clearly seen. Wait a few seconds, and then gently burnish the image with the back of a spoon. You may lift the corner of the paper to make sure the ink is transferring from all parts of the image.
  • Lift the paper and a beautifully imperfect image will appear!
The process is very unpredictable, but very satisfying! You never get the same results twice, so these transfers are a sure way to add unique images to your ATCs, art journal pages, collages, or other mixed-media projects.


I've been experimenting with Citra Solv image transfers on fabric and paper for a workshop I'm teaching this Tuesday at Ephemera Paducah - Stitcher's Stash Journal. I altered this image of roses in Romantic Homes magazine by gently rubbing it with just a bit of Citra Solv on a cotton ball. And I love the image transfer of a dress stand on Stonehenge paper! Some tips to remember when creating image transfers are:
  • Don't use too much Citra Solv or the ink may run, causing the image to blur or parts of it to disappear completely.
  • The fragrance is very strong, so be sure to work in a well-ventilated area.
  • Black and White images usually work best for this process.
I purchased my Citra Solv at Jerry's Artarama in Nashville, TN, but you can find a list of online and brick-and-mortar vendors who sell the product hereI can't wait to demonstrate these fun techniques, and I hope you will try them out for yourself too!

Until next time: Make Art...Be Happy!
Kimberly


Monday, April 7, 2014

Red, Black, & Cream Collage Journal


I love to dabble in arts and crafts of all kinds, but collage is my true love! My art never feels complete without the addition of paper of some type, and I love the mysterious layers and hidden meanings contained in collaged pieces.


Over the years I've gathered a rather large stash of materials including: vintage ephemera, sewing notions, scrapbook papers, and a wide variety of embellishments. When I sit down to create something, I appreciate all this bounty, but it can be a bit overwhelming! To overcome this happy challenge, I like to set a theme for myself. I may choose a particular motif to highlight, limit myself to 3 or 4 types of materials, or my favorite - select a color theme.


For the journal I'm sharing today, I chose one of my favorite color palettes: red, black, and cream. Even with a restricted color theme, the possibilities are still endless! In this journal I've used Citrasolv transfers, ice resin papers, vintage flashcards, sewing pattern tissue, all sorts of papers, buttons, ribbons, and so much more! It's a fun way to use up your stash and create something meaningful to you at the same time.


My other artful passion is creating my own handmade journals. But sometimes I find a special book like the one above that I want to use instead. I loved the nubby texture of this journal that I found at my local Barnes and Noble bookstore.


And the handmade Lokta paper inside is simply gorgeous! This book was lovingly hand-stitched, and is the perfect foil for my red, black, and cream pages. Next time you're ready to be creative, why not give yourself the challenge of a color scheme or theme that you love? You'll be surprised at how the ideas start to flow when your options have some boundaries!

Make art...be happy!
Kimberly

Friday, March 21, 2014

{Altered Books 101} Cover Story


The cover of an altered book often tells a story about what's inside. I chose a theme of Lost & Found for this book, so I wanted to embellish the cover in a way that reflects that idea. This book is all about the lost or discarded objects I love to find and collect for my art. I used some of those treasures for this cover, along with a few new tools and supplies to create a story that offers a glimpse of what's inside.


I loved the marbled turquoise cover of the Reader's Digest that I chose for this project, so I didn't want to cover it completely and lose the pretty pattern. Inspiration hit via Daniella's post about using tissue paper to cover her altered notebook! I covered the spine with a page torn from an old French book, and then I layered over the entire cover with tissue paper from 7gypsies. Matte gel medium from Liquitex worked well for both types of paper. I tore the edges of the tissue paper deliberately, revealing bits of the patterned cover and that gorgeous color!


A metal tag from Graphic 45 perfectly represented the sub theme of locks and keys found in the pages of the book. I used letter stamps from a fabulous vintage printer's set I recently scored on Ebay to stamp out the Lost & Found title. One of my favorite tips for using letter stamps is to choose the word you want to use, line up the letters, and then wrap the stamps together with Washi tape. This makes it so easy to stamp evenly spaced text! Some vintage trim from my stash and the word "Journal" stamped on a piece of cotton fabric finished off the cover.


I loved the 7 Gypsies tissue paper so much that I decided to use to create 2 simple backgrounds for the inside pages. I layered it over a piece of the French book page on the right, and directly on the book text on the left. Painted paper doilies and a bit more old book paper complete this set of backgrounds.


A page torn from a vintage postcard album that I found at an antique store and some of my cherished Liberty London fabric tape made for a quick and easy background! I can tuck a photo or a postcard in the grooves of the postcard page, or even some altered tags or ATC cards.
I hope you've enjoyed my posts during Altered Books Month here on the blog! I've learned some fun techniques from my fellow Design Team members that I can't wait try for my own books.
Until next time - make art...be happy!
Kimberly


Sunday, March 16, 2014

{Altered Books 101} Prep & Backgrounds


When it comes to altering books, the possibilities are endless. But it doesn't have to be a complicated process. With just a few simple materials, you can be on your way to creating an altered book in no time! All you really need to get started is a book, a glue stick, a ruler, and some clips. Use what you have on hand. Clothespins will substitute for the clips. A school ruler or a thick piece of cardboard cut to size will work perfectly for tearing pages. Most of us have books we no longer read taking up shelf space, and usually some kind of glue in a drawer or cupboard. Just grab what you have and let's get started!


The first step to altering a book is tearing out some pages throughout the book. Removing some of the pages makes room for the embellishments, photos, or ephemera that you might wish to add. It also keeps the the book from expanding too much on the fore edge, which reduces stress on the spine. I used a 1/4" steel rule to tear out my pages, but you can use a ruler or a piece of chipboard cut to the size you want.  I like the tattered edges created by tearing, but if you prefer even edges you can use a craft knife instead of tearing the pages. 


I divided my book into 5 sections and tore out 30 pages between each of them to create deep spacers for the bulky items I want to add to the book. Run a glue stick along all the edges of each section, and use the clips to hold them together while they dry. You can also use a tacky white glue or gel medium for this step.


I chose a theme of Lost & Found for this book, so I decided to include a quote on that subject, and a vintage escutcheon plate from my stash. The background was created with layers of white gesso, paint, scrapbook paper, a tea bag, and Stabilo and Derwent Inktense pencils. I used a vintage typewriter to type out the quote on paper torn from the book.


For this background, I layered white gesso, acrylic paints, the same pencils, and another typed quote. The circles were made with Yellow Ochre gouache. I used the cap to stamp the circles on the pages. 3 rusty keys from my collection were the perfect finishing touch! 


Clear gesso and pearlescent watercolors along with crumpled and torn tea bags created lots of texture and shimmer for this background. I love how the transparency of the watercolors and the tea bags allow the book text to peek through!


I hope you enjoyed this glimpse at some of the techniques I like to use for altered books. I'll be back on March 21st with 3 more background techniques, and the cover for this Lost & Found Journal. Until then, be sure to check out the great tips and techniques my fellow design team members have shared, and stay tuned for more inspiration as Altered Books Month continues!