Sunday, April 27, 2014

Spring is Music to my Eyes


 Happy Sunday everyone! leslierahye here sharing with you an art journal page that I did in my K & P Imports art journal. Right now the world around me is bloom with beautiful spring flowers. This is my favorite time of the year to photograph nature. My family often takes a trip out into the county to capture the glory of the wildflowers near us. This page contains one of my bluebonnet photos that I recently took.

I began by creating a watercolor background with layering washes across the page. Once dry, I splattered the same colors from the wash to get concentrated splats of color! After they were fully dry, I doodled a border with black an white paint pens. I fussy cut my photo and glued it down. I then traced around the photo with white paint pen and a grey brush PITT pen. With the paint pen I added the quote "The earth has music for those who listen." The flowers in the fields and along the roadways are a symphony to me. I hope you enjoy my page!

Monday, April 21, 2014

Citra Solv Adventures


Citra Solv is a natural cleaner with a wonderful citrus scent. But I didn't break out my bottle for spring cleaning! This versatile product is an amazing tool for creating artful backgrounds, ATCs, image transfers, and so much more!


I created these dreamy backgrounds using nothing more than a generous application of Citra Solv on some pages in an old copy of National Geographic. Simply fill a spritzer bottle with some of the cleaner, liberally coat several pages of your choice in the magazine, and allow the pages to mush together for 10-15 minutes. {If you prefer, you can directly apply the Citra Solv with a foam brush} Open the pages, mush together some more if you wish, and then soak up any excess ink with paper towels. Tear out your favorite pages, allow them to dry, and you will have several unique backgrounds for your art! The process can be quite messy, so be sure to cover your work area with newspapers for easier clean-up.


Here are a couple of pages I created for my art journal using the backgrounds and an image transfer of a bird from The Graphics Fairy.


Creating an image transfer using Citra Solv is a very simple process. Just follow these easy steps:
  • Print out an image using a laser printer, or get one made at a copy shop or your local library. The ink used needs to be toner-based to work, so don't use copies from an ink jet printer. Be sure to reverse the image when printing, especially if contains any text.
  • Place the image face down on the desired surface, saturate a cotton ball with Citra Solv and rub it all over the paper until the image is clearly seen. Wait a few seconds, and then gently burnish the image with the back of a spoon. You may lift the corner of the paper to make sure the ink is transferring from all parts of the image.
  • Lift the paper and a beautifully imperfect image will appear!
The process is very unpredictable, but very satisfying! You never get the same results twice, so these transfers are a sure way to add unique images to your ATCs, art journal pages, collages, or other mixed-media projects.


I've been experimenting with Citra Solv image transfers on fabric and paper for a workshop I'm teaching this Tuesday at Ephemera Paducah - Stitcher's Stash Journal. I altered this image of roses in Romantic Homes magazine by gently rubbing it with just a bit of Citra Solv on a cotton ball. And I love the image transfer of a dress stand on Stonehenge paper! Some tips to remember when creating image transfers are:
  • Don't use too much Citra Solv or the ink may run, causing the image to blur or parts of it to disappear completely.
  • The fragrance is very strong, so be sure to work in a well-ventilated area.
  • Black and White images usually work best for this process.
I purchased my Citra Solv at Jerry's Artarama in Nashville, TN, but you can find a list of online and brick-and-mortar vendors who sell the product hereI can't wait to demonstrate these fun techniques, and I hope you will try them out for yourself too!

Until next time: Make Art...Be Happy!
Kimberly


Thursday, April 17, 2014

ATCs TO SWAP

You know that I join the WOYWW party every week.  In a few weeks, it will be the 5 year anniversary of this wonderful weekly event! We  will be having a global ATC swap for the occasion!  I will send my 1 *which is all I have  to do* and some more to other friends.
I went to the Altered Arts Magazine sponsor box of goodies and got busy!
 
I started with my 7gypsies Collage tissue and some Mod Podge.  I applied the Mod Podge to the ATC blank and laid the tissue on top carefully.  Then I layered some 7gypsies paper, that I ripped to make it more interesting.  I used 7gypsies stamps "Numero" and Pink Paislee stamps too.  Of course, gauze and rope finished them off.
 
I can't wait to send them out!

Tuesday, April 15, 2014

Did you vote for the cover of the next issue?

It's getting close to the release of the spring issue of Altered Arts
Magazine (set to come out the week of April 20th)--did you vote
for the cover on the AAM facebook page?
I won't tell which cover won--well, since all the pieces are in the
issue, they're all winners, right?  But if you haven't seen the results
yet, stop by the AlteredArts Magazine facebook page for the
update. 

Here's a close up detail look at one of my pieces for this issue:
(If you haven't subscribed yet, you can find details HERE.)
Happy Tuesday, everyone!
:)trisha

Sunday, April 13, 2014

My Favorite Things ATCs


My Favorite Things Series 1
 Happy Sunday everyone! leslierahye here sharing with you two series of Altered Trading Cards that I recently made to swap. Altered Trading Cards are little artworks on a 2½×3½" canvas. The theme of this swap was "My Favorite Things."

These cards began as a watercolor paper print of mono prints that I had created on gelli plates. When I'm mono printing, I find that there are some prints that I just LOVE and I will scan them so that I can use them in art in the future. The backgrounds I've used here I have used as paper, as digital buttons for events, and as ATC backgrounds. 

Next I heat embossed the cards with some of my favorite Globecraft & Piccolo Craft Emboss Powders. I used adhesive to emboss the edges. Next I sprinkled some emboss powder on the surface of the watercolor ATC and then heat set from below so that the emboss powder looked more random...creating interesting patterning.
My Favorite Things Series 2

Finally I tangled on my ATC. Zentangling and doodling is my happy place and one of my all-time favorite things. I can relax and breathe when I tangle. It seemed appropriate that my two series of Favorite Things ATCs contain tangles!

Each series contained a total of 4 cards and were swapped with friends across the country. It's always fun receiving art from others and ATCs are easy to make and share! I hope you try some of your own!


Monday, April 7, 2014

Red, Black, & Cream Collage Journal


I love to dabble in arts and crafts of all kinds, but collage is my true love! My art never feels complete without the addition of paper of some type, and I love the mysterious layers and hidden meanings contained in collaged pieces.


Over the years I've gathered a rather large stash of materials including: vintage ephemera, sewing notions, scrapbook papers, and a wide variety of embellishments. When I sit down to create something, I appreciate all this bounty, but it can be a bit overwhelming! To overcome this happy challenge, I like to set a theme for myself. I may choose a particular motif to highlight, limit myself to 3 or 4 types of materials, or my favorite - select a color theme.


For the journal I'm sharing today, I chose one of my favorite color palettes: red, black, and cream. Even with a restricted color theme, the possibilities are still endless! In this journal I've used Citrasolv transfers, ice resin papers, vintage flashcards, sewing pattern tissue, all sorts of papers, buttons, ribbons, and so much more! It's a fun way to use up your stash and create something meaningful to you at the same time.


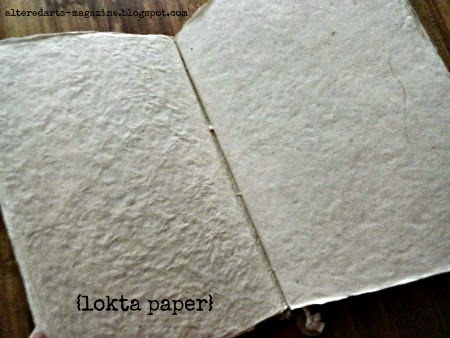
My other artful passion is creating my own handmade journals. But sometimes I find a special book like the one above that I want to use instead. I loved the nubby texture of this journal that I found at my local Barnes and Noble bookstore.


And the handmade Lokta paper inside is simply gorgeous! This book was lovingly hand-stitched, and is the perfect foil for my red, black, and cream pages. Next time you're ready to be creative, why not give yourself the challenge of a color scheme or theme that you love? You'll be surprised at how the ideas start to flow when your options have some boundaries!

Make art...be happy!
Kimberly

Sunday, April 6, 2014

Impossible Things Altered Book Pages!


 Happy Sunday everyone! leslierahye here to share with you the completion of my pages created with the niche that I started last month. I left off with the pages gessoed and the base of the niche cut with the boxes placed into the recess.


I began by layering color with Faber-Castell Gelatos and Derwent watercolor pencils. Using a variety of stencils I chalked with Pan Pastels in various places and smeared gently with my fingers. 

Layers of paper, burlap paper and tissue tape were added for more texture both actual and implied. More stenciling occurred. I also inked the edges of the pages and recess with Copper Brilliance Ink. A stamped quote was added on a piece of distressed card stock. 


The "specimens" were cut from a piece of SEI paper and added to the niches in the recess and to the burlap strip below the recess. Mini dew drops from Robin's Nest were added to a few niche boxes as well. 


I hope after the past month you are inspired to try altering a book yourself. Remember "The impossible is often the untried!" Thank you for stopping by!


 Be sure to click below if you missed any of the posts on Altered Books! The team shared lots of tips and inspiration during the month! We hope you enjoyed them!


Thursday, April 3, 2014

CELERY STALK ROSES

I have a fun project to share today!  I wrote an article about it in the Winter 2014 Issue of Altered Arts Magazine.

All you need is a nice thick paper, like watercolor paper, A stalk of celery and some inks.  Cut a straight cut across the bottom of the celery, about 2 inches from the bottom. 

 I used acrylic paint and inks to make some backgrounds.  Then, I applied ink to the celery and stamped!


How awesome is that?  They look like roses!


Just use a baby wipe to take the ink off of your celery (or cut a little bit off to get fresh celery again) and you are ready to stamp again.


All different colors of "roses"  for beautiful backgrounds.  Or, stamp them as a focal point on a card, fabric or anything.  That's the fun of art!

Who ever said you can't play with your food?

*No celery were wasted during the making of these backgrounds.  I put cream cheese and olives on the stalks and we enjoyed them very much.*

Tuesday, April 1, 2014

machine stitched atc

Did you enjoy Altered Book Month (March) with Altered Arts Magazine?  I'm breaking in the new month with a two similar machine stitched atcs--no April Fool's here:

A collaged and painted background, painted & stitched heart.
(Can you see the sheet music peeking through the paint?)

So, with or without the text?
A heart at peace gives life to the body . . . Proverbs 14:30
Happy April, everyone!
:)trisha